kos ygeia
Woocommerce webhook

General
Woocommerce Webhooks are actions that can be defined in the Woocommerce plugin of Wordpress, so that when a specific event occurs (e.g., order update), the corresponding command for document issuance set in Workadu is executed.
Requirements
To activate Woocommerce Webhooks you will need the following:
- a Workadu account - register for Free here
- an active Wordpress installation with Woocommerce plugin installed
- connection credentials with AADE MyData - See the instructions here
- Integration and an active billing plan with a provider (not required for testing) - Contact the support department via the Chat System at the bottom right of our platform’s management environment
Integration implementation
1. In your Woocommerce plugin, go to
- From the Wordpress dashboard, select WooCommerce > Settings > Advanced.
- Next, go to the Webhooks section.
- Click the button Add webhook.
- From the list, select "Order update" (this event will run when the order status changes).
-
Fill in a desired password that will be used for the integration with Workadu.
- In the URL field, leave it temporarily empty and click "Update webhook"

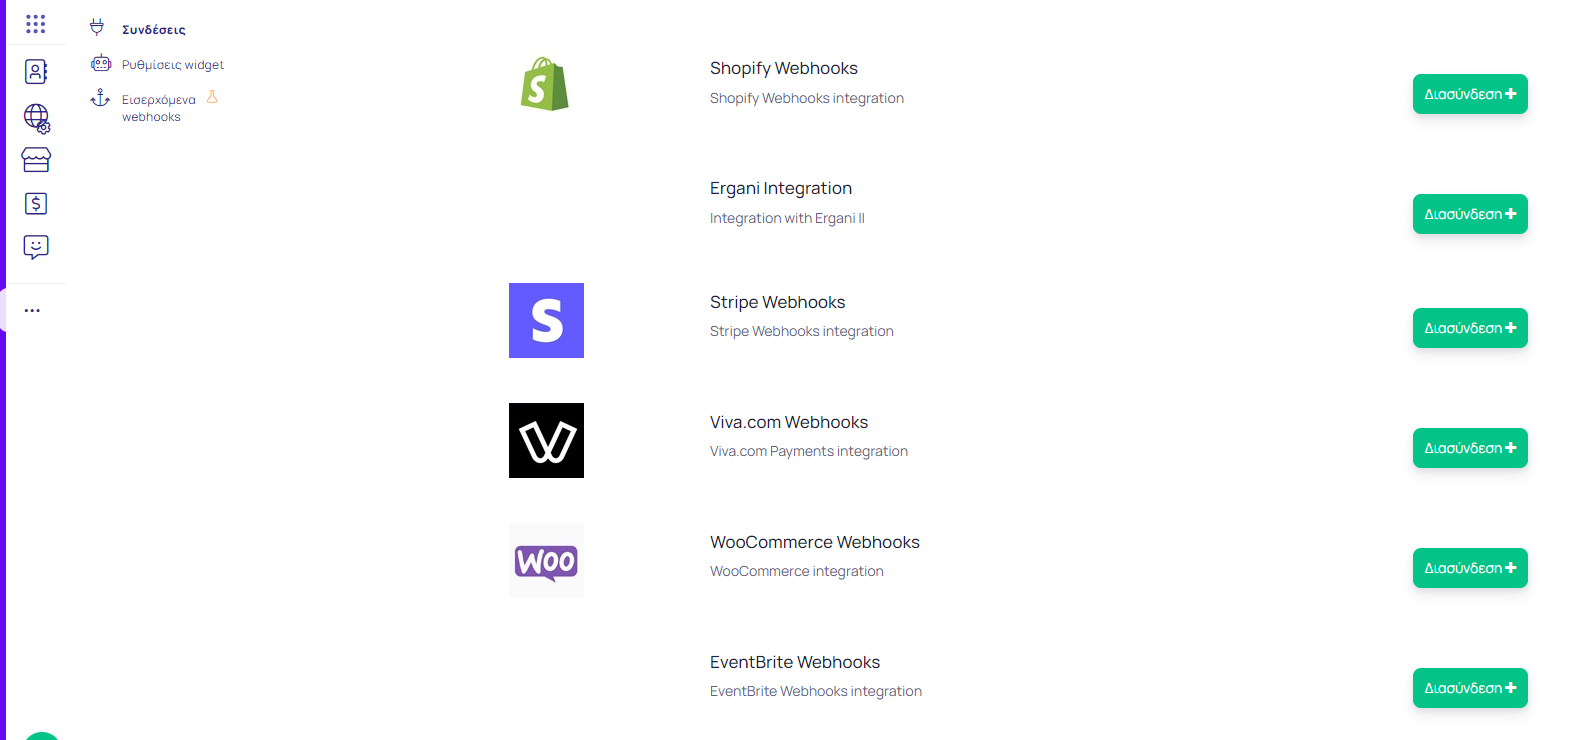
2. Next, go to the Workadu app. Click on the three dots on the middle-left of the screen where the section "More" is located, and click on the "Connections" option. Then, scroll down until you find the Woocommerce Webhooks option and click the "Connect" button.
3. Inside the integration, you will see one field that you need to fill with the password you entered in Step 1. Then click Save and Connect.

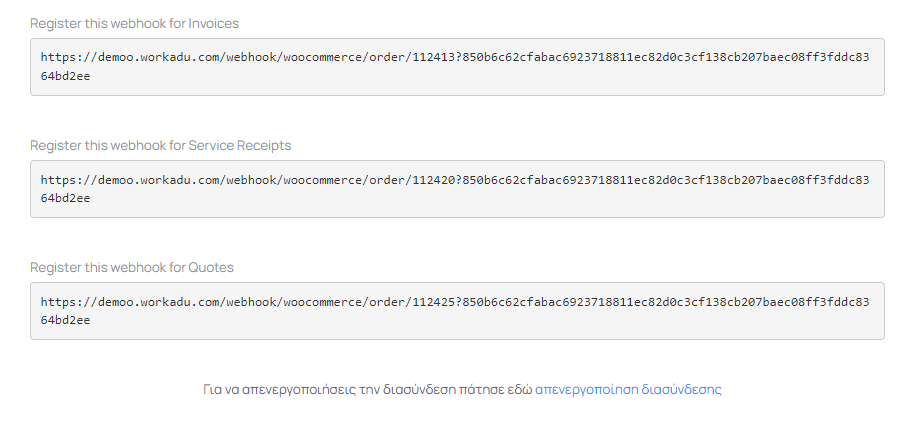
4. Next, select the type of document you want to issue by copying one of the 3 suggested document types that appear. If the document type you want does not appear here, please contact our platform support.
5. Once you have completed the setup in Workadu, go back to your Woocommerce plugin and go to the same place where you created the webhook in Step 1, then paste the string you copied into the Delivery URL field that you left empty.
6. Finally, to check if the integration was done correctly, you will need to make a test order from your website or through the Wordpress dashboard. You will then be able to see the document created in the Finance > Documents section of Workadu.
- The Woocommerce Webhooks integration works with only one document type, meaning there is no option to separate the types of documents you want to issue automatically. If you need more than one type, we provide detailed training on how you can transform your documents within the Workadu app.
- There is a chance that you might see an error message with the number "Error 401", even if you have done the integration correctly. To verify the integration status, first perform the test order and if you encounter any issues, please contact our support team.
Go live
After completing the above steps, and ensuring that the transmission of documents is correct, through sending the "test," you should proceed via our support for connection with the AADE MyData. In the case of connecting with an electronic invoicing provider, additional steps will be required. Below you will find the procedure after activating the webhooks so that certification can be performed by our technical consultant.
- Activation of subscription plan in Workadu
- Completion of the process for issuing documents through a provider (Retail Receipts). See instructions here
- Issue a test order in the eshop. Log in to Workadu and check the issued document.
- Request support (9:00-17:00) via the chat system within Workadu